Showing posts with label fruits. Show all posts

Friday, August 19, 2011

Strawberry Summer Cake

My mother-in-law loves strawberries. One of the many things we have in common! When I went to make a cake for her birthday dinner, I knew it had to incorporate this delectable summer fruit. I found this recipe on The Smitten Kitchen blog.

Strawberry Summer Cake
adapted from Martha Stewart by Smitten Kitchen
  • 1 1/2 cups (188 grams) all-purpose flour (can swap 3/4 cup or 94 grams all-purpose flour with 3/4 cup or 75 grams of barley flour, see Note)
  • 1 1/2 teaspoons baking powder
  • 1/2 teaspoon table salt
  • 6 tablespoons unsalted butter, at room temperature, plus extra for pie plate
  • 1 cup (200 grams) plus 2 tablespoons (25 grams) granulated sugar
  • 1 large egg
  • 1/2 cup (118 ml) milk
  • 1 teaspoon (5 ml) vanilla extract
  • 1 pound (or as many will fit!) strawberries, hulled and halved
Preheat oven to 350°F. Butter a 10-inch pie pan. This cake does not work in a standard 9-inch pie pan; it will overflow. Big apologies to anyone who learned the hard way! This cake would work, however, in a 9- or 10-inch springform or cake pan. The 10-inch would make a thinner cake than pictured.
Whisk flour or flours, baking powder and salt together in a small bowl. In a larger bowl, beat butter and 1 cup sugar until pale and fluffy with an electric mixer, about 3 minutes. Mix in egg, milk and vanilla until just combined. Add dry mixture gradually, mixing until just smooth.
Pour into prepared pie plate.
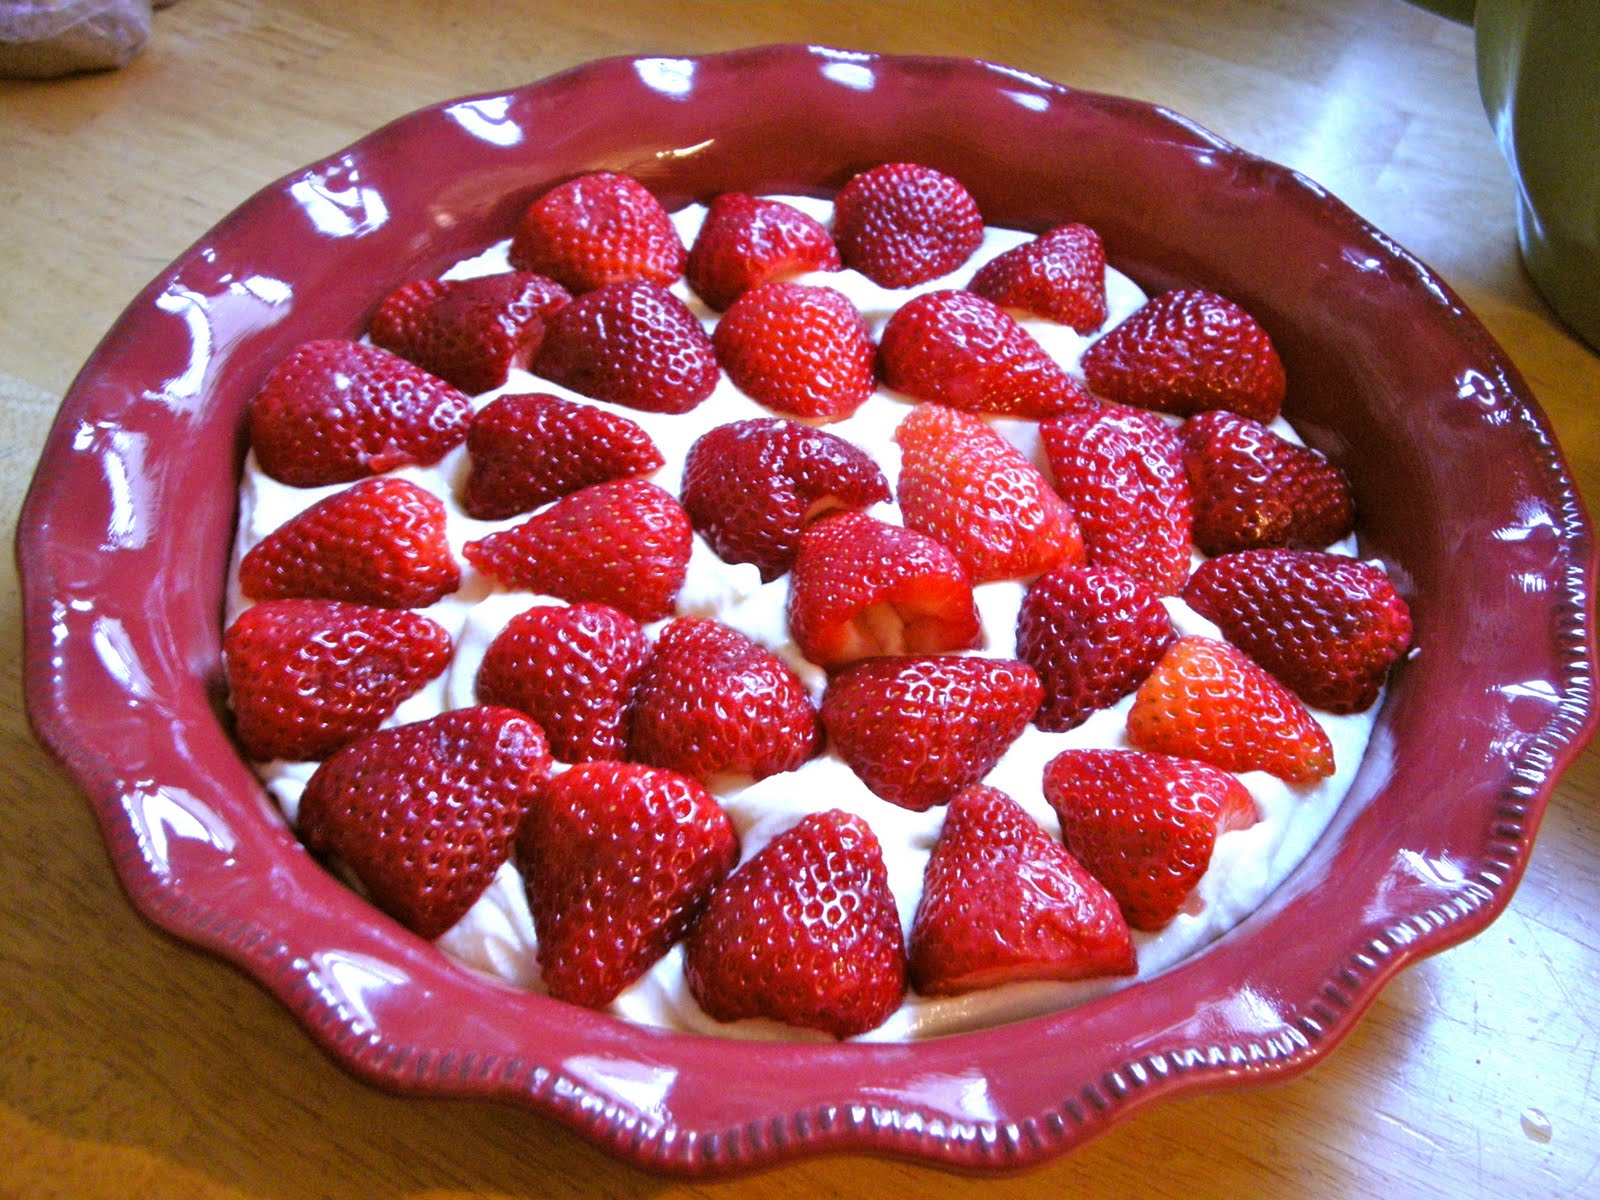
Arrange strawberries, cut side down, on top of batter, as closely as possible in a single layer (though I had to overlap a few to get them all in). Sprinkle remaining 2 tablespoons sugar over berries (I only used about 1 1/3 tbsp sugar and I thought it was plenty).
Bake cake for 10 minutes then reduce oven temperature to 325°F and bake cake until golden brown and a tester comes out free of wet batter, about 50 minutes to 60 minutes. (Gooey strawberries on the tester are a given.) Let cool in pan on a rack. Cut into wedges. Serve with lightly whipped cream (or vanilla ice cream).
Do ahead: Cake can be stored at room temperature for up to 2 days, loosely covered.

Friday, July 15, 2011

Peach Crostata

I had some girlfriends over for dinner last week. I hadn't planned well for dessert but had a bunch of gorgeous summer peaches on hand. I also keep frozen pie crusts in the freezer at all times. This would be enough to throw together a crostada. What I love about a crostada is that it's done in free form. Since I'm not a great baker, "free form" is right up my alley! I was able to put it together in just a few minutes. The results were rustic and delicious!!!

Peach Crostata

Ingredients

  • 1 good frozen pie crust, thawed out (still cold but soft enough to handle)
  • 1 egg
  • sugar
Filling:
    • 4 large ripe peaches, pitted and sliced into eighths
    • 1/2 lemon, juiced
    • 2 tbsp sugar
    • 1/2 tsp cinnamon
    • 2 tsp all-purpose flour

    Directions

    Preheat oven to 375 degrees F.

    To make the filling, gently toss the peaches, lemon juice, sugar, cinnamon and flour in a large mixing bowl until fruit is coated evenly. Set aside.

    To make an egg wash, beat the egg in a small bowl with a tablespoon of water. Set aside.

    Transfer the thawed out pie crust to a baking sheet. Spoon the fruit mixture into the center of the dough, leaving a 2-inch border all around. Then brush the border with the egg wash and lift the edge of crust over the filling, leaving the fruit exposed in center. Pinch the dough to seal any cracks. Brush the crust with the remaining egg wash and sprinkle with a tablespoon of sugar.

    Bake the crostata for 30 to 40 minutes or until the crust is golden brown and fruit is bubbly and tender.

    Serve warm or at room temperature with vanilla ice cream.

    Wednesday, July 6, 2011

    White Wine Sangria

    One of my favorite summer cocktails is a white wine sangria. It's lighter than its red wine counterpart and has just the right amount of kick. A perfect way to make any get-together more festive!

    White Wine Sangria

    • 1/4 cup sugar
    • 1 lime, washed and cut into 1/4 inch slices
    • 1 lemon, washed and cut into 1/4 inch slices
    • 1 orange, washed, halved and cut into 1/3 inch slices
    • 1 ripe peach, cut into wedges
    • 1 ripe green apple, seeded and cut into wedges
    • 1/2 cup brandy
    • 1 bottle white Rioja Spanish wine or other dry white wine
    • 2 cups gingerale 
    • 1 cup frozen raspberries (optional, gives the sangria beautiful reddish hue)

    Put sugar, lime, lemon, orange, peach and apple into a large pitcher. Slightly squeeze some of the juice from the citrus fruits as you add them to the pitcher. Add the brandy and wine to the pitcher and stir everything together. Cover the pitcher with a lid or plastic wrap and chill for several hours, even overnight. When ready to serve, add the gingerale (and frozen raspberries if you desire) and stir well. Spoon some fruit into glasses or goblets and pour sangria over top of the fruit. Serve immediately.

    Monday, November 29, 2010

    The Best Banana Bundt Cake

    I had four bananas that were so ripe that I thought they might turn into goo if I let them go one more day. Usually I would make a banana bread and call it a day. Today I just wasn't feeling it. I was concerned that I might fall asleep from boredom if I made one more banana bread. There had to be something else I could do with the bananas. 

    I snooped around the internet and found The Best Banana Bundt Cake recipe by Dorie Greenspan. It had great reviews and I had everything I needed in my pantry.  

    It came out beautifully. A moist cake that was lighter than my usual banana bread. My only issue was,  I was so excited to slice and eat it that I forgot to take a picture until much later. So here are photos of less than half the cake!

    The Best Banana Bundt Cake 

    By Dorie Greenspan

    Ingredients

      • 3 cups all-purpose flour
      • 2 teaspoons baking soda
      • 1/2 teaspoon salt
      • 8 ounces unsalted butter, at room temperature ( 1/2 cup or 2 sticks)
      • 2 cups sugar
      • 2 teaspoons pure vanilla extract
      • 2 large eggs, preferably at room temperature
      • about 4 very ripe bananas, mashed ( 1 1/2 - 1 3/4 cups)
      • 1 cup plain yogurt (or a combination of the two) or 1 cup sour cream ( or a combination of the two)

    Directions

    1. Center a rack in the oven and preheat to 350°F Generously butter a 9- to 10-inch (12 cup) Bundt pan. (If you use a silicone pan there's no need to butter it.) Don't place the pan on a baking sheet - you want the oven's heat to circulate through the Bundt's inner tube.
    2. Whisk the flour, baking soda and salt together.
    3. Working with a stand mixer, preferably fitted with a paddle attachment, or with a hand mixer in a large bowl, beat the butter until creamy. Add the sugar and beat at medium speed until pale and fluffy. Beat in the vanilla, then add the eggs one at a time, beating for about 1 minute after each egg goes inches Reduce the mixer speed to low and mix in the bananas. Finally, mix in half the dry ingredients (don't be disturbed when the batter curdles), all the sour cream and then the rest of the flour mixture. Scrape the batter into the pan, rap the pan on the counter to debubble the batter and smooth the top.
    4. Bake for 65-75 minutes, or until a thin knife inserted deep into the center of the cake comes out clean. Check the cake after about 30 minutes - if it is browning too quickly, cover it loosely with a foil tent. Transfer the cake to a rack and cool for 10 minutes before unmolding onto the rack to cool to room temperature. If you have time, wrap the cooled cake in plastic and allow it to sit overnight before serving - it's even better the next day.
    5. OPTIONAL LEMONY WHITE ICING: Sift 3/4 cup confectioners' sugar into a bowl and squeeze in enough fresh lemon juice (start with 2 teaspoons and add more by drops) to make an icing thin enough to drizzle down the Bundt's curves.
    6. MUFFIN OPTION: Halve the recipe. You can add nuts or chocolate chips. Bake 28-32 minutes. Yields 12 muffins. 
    Cool Tools:

    Monday, October 11, 2010

    Sangri-LA!

    I know this is a blog written by a mom. So if I offend anyone by posting an alcoholic beverage as my blog of the day...I'm sorry. Like most of you fellow-parents out there, I like to enjoy an alcoholic beverage every now and then! It can't always be about the kids, right?


    Here is how I made the sangria from the other night. I added a decent amount of ginger ale for sweetness and some fizz. A lovely adult beverage on a scorching hot autumn day in L.A.. It came out pretty good I think.


    Sangri-LA
    • 1 bottle of good or at least drinkable red wine
    • 1 lemon cut, washed and halved and cut into 1/4 inch thick slices
    • 1 orange, washed and halved and cut into 1/4 inch thick slices
    • 1 large apple; washed, cored and cut into 1/2 inch cubes
    • 2 tbsp sugar
    • 1/2 cup brandy
    • 3 cups ginger ale (if you prefer it sweeter like me) or club soda 
    Pour wine into a large pitcher and squeeze the juice wedges from the lemon and orange into the wine. Toss in the fruit wedges (no seeds), add sugar and brandy. Stir well.

    Refrigerate for at least a few hours or overnight.

    Add ginger ale/club soda and stir just before serving.

    Serve over ice.

    Monday, August 9, 2010

    Crunchy Top Banana Nut Muffins

    Lately I've been making a conscious effort not to waste food. I am proud to report of a "killing of two birds with one stone" incident (I do not actually condone bird killing by the way).

    We occasionally have granola for breakfast. Problem is, there is always a large amount of crumbs left at the bottom of the box. So instead of throwing out almost two cups of granola crumbs, I poured them all into a Ziploc bag and vowed to use them in some sort of baking.

    Well today I had three super ripe bananas that needed to be used immediately or end up in the trash tomorrow morning. I usually make a banana bread but I thought muffins would be more fun for the kids. Then I remembered those crumbs. What a great crunchy topping they would make!


    Crunchy Top Banana Nut Muffins
    • 1/2 cup (1 stick) unsalted butter
    • 2 eggs (large or extra-large), lightly beaten
    • 1/2 cup sour cream or plain yogurt
    • 3 LARGE, very ripe bananas, mashed
    • 2 tsp vanilla
    • 2 cups of flour
    • 3 tbsp ground flaxseed meal (optional)
    • 3/4 cup sugar
    • 3/4 tsp baking soda
    • 1/2 tsp salt
    • 3/4 cup chopped walnuts or pecans, lightly toasted
    Crumb topping (optional)
    • 3/4 cup granola crumbs (or ground up granola) 
    • 1 tbsp sugar

    Adjust the oven rack to the lower-middle position. Preheat oven to 375 degrees F.

    Melt the butter. A large glass mixing bowl in the microwave works great. Set aside to cool. In the meantime; whisk the flour, flaxseed, sugar, baking soda and salt together in a separate mixing bowl. Set aside

    Add the mashed bananas, sour cream/yogurt, eggs and vanilla to the melted butter bowl. Mix well. Next add the dry ingredients and walnuts to the bowl and fold until just combined. Don't over mix. Pour the mixture into lined muffin pans, a large cookie scoop works well for this.

    Mix the granola and tablespoon of sugar together in a bowl.
    Sprinkle some of the mixture on top of each muffin.

    Bake for 20-25 minutes. If a toothpick comes out clean then they're done. If not, then bake for a few more minutes.

    Let cool for 5 minutes. Remove muffins from the pan and place them on a cooling rack.

    Cool Tools:


    Friday, July 23, 2010

    Romancing the plum...

    I love to read cooking magazines. My favorites are the ones with beautiful photos and art direction. Oh, and of course tempting recipes. I enjoy them like a good romance novel. Except the love affair is with food!

    While flipping through the latest Martha Stewart Living the other day, I came across the most charming looking cake. The whole cake was cooked in a cast iron pan/skillet and had fresh plums fanned across the top. It seemed old-fashioned and almost...romantic!

    I asked my almost-too-good-to-be-true mother-in-law to assist me with the skillet cake while I finished making dinner. Well before you know it, she was done and I hadn't done a thing to help. 

    We served it warm with a scoop of vanilla ice cream. The plums added a little tartness and the cake was soft in the middle, crispier towards the edge. It was wonderful. Thanks, Mom!
    Plum Skillet Cake

    Martha Stewart Living, August 2010

    • 4 tbsp unsalted butter, room temperature, plus more for skillet
    • 1 cup all-purpose flour, plus more for skillet
    • 1/2 tsp baking powder
    • 1/4 tsp baking soda
    • 1/2 tsp coarse salt
    • 3/4 cup plus 2 tablespoons sugar
    • 1 large egg
    • 1/2 cup low-fat buttermilk
    • 2 ripe medium plums, thinly sliced
    Preheat oven to 350 degrees F. Butter an 8 inch ovenproof skillet (preferably cast-iron); dust with flour, tapping out excess. Whisk together flour, baking powder, baking soda, and 1/2 teaspoon salt. Beat butter and 3/4 cup sugar with a mixer on medium speed until pale and fluffy. Beat in egg. Add flour mixture in 3 additions, alternating with buttermilk.

    Pour batter into prepared skillet and smooth top with an offset spatula. 

    Fan plums on top, and sprinkle with remaining 2 tablespoons sugar. Bake until golden brown and a toothpick inserted in the center comes out clean, 35 to 40 minutes. Let cool slightly.
    Cut into 6-8 wedges.


    Cool Tools:

    Monday, June 7, 2010

    Tropical paradise...

    I love tropical flavors. Spicy jerk chicken, fresh mango, piña coladas, coconut anything really. I thought I'd add a tropical twist to my banana bread today.

    This may be my new way to do banana bread. So good! I can't wait to put some vanilla ice cream on a warm piece for dessert.

    Coconut and Rum Banana Bread

    • 6 tbsp (3/4 stick) unsalted butter
    • 2 eggs (I use extra-large but large is fine too), beaten
    • 1/2 cup vanilla yogurt (plain would work)
    • 3 large or 4 small, very ripe bananas; mashed
    • 1 1/2 tsp rum extract
    • 2 cups of all purpose flour
    • 3/4 cup sugar
    • 3/4 tsp baking soda
    • 1/2 tsp salt
    • 1 cup sweetened shredded coconut (baking aisle)
    Adjust the oven rack to the lower-middle position. Preheat oven to 350 degrees F. Grease your loaf pan and dust it with flour. Tap out the excess flour.

    Melt the butter in a large glass mixing bowl. Microwave works great. Set aside to cool. In the meantime, whisk the flour, coconut, sugar, baking soda and salt together in a separate mixing bowl. Set aside

    Add the mashed bananas, yogurt, eggs and vanilla to the cooled melted butter bowl. Mix well. Next add the dry ingredients to the bowl and fold until just combined. Don't over mix. Pour the mixture into the loaf pan. Bake for 55 minutes. If a toothpick comes out clean then it's done. If not then bake for a few more minutes.

    When the loaf has cooled down enough to handle, gently remove from the pan and put it on a cooling rack.

    Cool Tools:

    Sunday, March 7, 2010

    A series of fortunate events...

    One of my dearest friends invited me over to her place for dinner. She's a fantastic cook so I was very excited to take a night off from cooking. I was in charge of dessert which was probably not the best idea. I may have mentioned this before...I'm a terrible baker! I found out that her boyfriend was a lover of all things lemon so that narrowed things down tremendously.

    I decided to go with lemon bars. Seemed easy enough and there was little room for errors. I made half the recipe and used an 8 inch square baking pan. The cooking time for the crust I increased by a couple of minutes. I am also a fan of lemony goodness so I kept the amount of zest at 1 tablespoon. Writing this, I am starting to see why I suck at baking. With cooking, you can add a dash of this and substitute with that. Baking is very precise. I'm pretty sure it's my alterations that get me into trouble.

    So the lemon bars turned out very thin but quite delicious. They weren't going to win any beauty contests but good enough to take over to the dinner party. And for my baking skills, that's a step forward.

    Double Lemon Bars

    Bon Appétit  | July 1991
    by Lana Sills: North Hollywood, California

    Thursday, February 25, 2010

    On Blueberry Hill...

    I found this recipe online when I Googled "best blueberry muffins".  I didn't have fresh blueberries but there were some organic wild blueberries in my freezer. I defrosted them, drained most of their juice and used them in place of the fresh blueberries. I also thought the crumb topping was adding too much extra sugar and butter to a recipe that already had plenty of both to start with. For the crumb topping, I reduced the measurements to 1/8 cup of flour, a little more than 1/8 cup of sugar, 2 tablespoons of butter and 1 teaspoon of cinnamon. I have to say, they were pretty to die for.

    To Die For Blueberry Muffins 

    by Connie

    • 1 1/2 cups all-purpose flour
    • 3/4 cup white sugar
    • 1/2 teaspoon salt
    • 2 teaspoons baking powder
    • 1/3 cup vegetable oil
    • 1 egg
    • 1/3 cup milk
    • 1 cup fresh blueberries
    • 1/2 cup white sugar
    • 1/3 cup all-purpose flour
    • 1/4 cup butter, cubed
    • 1 1/2 teaspoons ground cinnamon

    Directions

    1. Preheat oven to 400 degrees F (200 degrees C). Grease muffin cups or line with muffin liners.
    2. Combine 1 1/2 cups flour, 3/4 cup sugar, salt and baking powder. Place vegetable oil into a 1 cup measuring cup; add the egg and enough milk to fill the cup. Mix this with flour mixture. Fold in blueberries. Fill muffin cups right to the top, and sprinkle with crumb topping mixture.
    3. To Make Crumb Topping: Mix together 1/2 cup sugar, 1/3 cup flour, 1/4 cup butter, and 1 1/2 teaspoons cinnamon. Mix with fork, and sprinkle over muffins before baking.
    4. Bake for 20 to 25 minutes in the preheated oven, or until done.

    Sunday, February 14, 2010

    Orange ya glad I didn't say banana?

    Our lovely neighbors have an orange tree that grows over the wall that separates our properties and into our yard. They told us we could have whatever was on our side. Any of you that have fruit trees know how great they are to have around.
    Our oranges are ripe now and are quite delicious. We've made juice for the kids and sometimes they'll ask to eat one in the backyard. It finally crossed my mind that I should try to incorporate them into a recipe. What I came up with was seared salmon with an orange salsa. The salsa is very simple; just a few ingredients I had around. The oranges are sweet and slightly tart, cutting the richness of the salmon perfectly. The capers add a nice saltiness. I could eat this all the time!
    Seared Salmon With Orange Salsa
    Serves 4 people

    Orange Salsa
    • 2 cups orange segments; skin, white pith and surrounding membranes removed; cut into bite-size pieces
    • 2 tbsp shallots, chopped fine
    • 4 tbsp capers, drained
    • 2 tsp orange muscat champagne vinegar or any other light vinegar you have around
    • 4 tsp good extra virgin olive oil 
    Add the oil and vinegar to a bowl and whisk together. Add the rest of the ingredients and gently fold them together to combine. 


     Seared Salmon
    • 4 fresh, boneless/skinless salmon fillets; rinsed in cold water and dried well with paper towels
    • olive oil
    • salt and pepper
    Heat 1 tablespoon of oil in a large pan over medium-high heat. Lightly season both sides of the fillets with salt and pepper. When oil is glistening, add the salmon pretty side down and cook 3 minutes. Flip them over and cook for another 2 to 2 1/2 minutes depending on how thick your fillets are. Plate the salmon and spoon some orange salsa on top.

    Sunday, January 31, 2010

    Bonafide soccer mom...

    Growing up, I didn't dream of becoming a "soccer mom". I always knew I wanted kids but I thought that I'd settle down after my big career in fashion design or acting. Well I never became an actress or fashion designer, although I do have a love affair with fashion and can be over dramatic at times. I am now a mother to two incredible children and couldn't ask for a better man than my husband. I wouldn't trade it for all the glamour in the world.

    A few months ago, I literally became a soccer mom. My son started taking soccer classes at a local park on Sundays. The coaches are amazing and the fellow parents make it a joy to be there every weekend. I was motivated this morning and baked banana muffins for everyone to snack on during class. The recipe is the same as the banana bread but muffins are easier to distribute and eat on the go. Just enough fuel to keep those mini-Beckhams moving. Next on the list...a minivan.

    Banana Muffins

    6 tbsp (3/4 stick) unsalted butter
    2 eggs (large or extra-large), beaten
    1/2 cup plain yogurt
    3 LARGE, very ripe bananas; mashed
    2 tsp vanilla
    2 cups of flour
    3/4 cup sugar
    3/4 tsp baking soda
    1/2 tsp salt

    1 cup milk chocolate chips (Ghirardelli's are delicious) or toasted chopped walnuts or both!

    Adjust the oven rack to the lower-middle and upper-middle positions. Preheat oven to 350 degrees F. Line your muffin pans with paper liners.

    Melt the butter in a large glass mixing bowl. Microwave works great. Set aside to cool. In the meantime, whisk the flour, sugar, baking soda and salt together in a separate mixing bowl. Set aside

    Add the mashed bananas, yogurt, eggs and vanilla to the melted butter bowl. Mix well. Next add the dry ingredients and chocolate chips to the bowl and fold until just combined. Don't over mix. Scoop the mixture into the muffin tins. Today my batter made 16 muffins.

    Bake for about 35 minutes. Quickly switch the muffin pans onto the other rack halfway through (18 minutes) to ensure even cooking. Do not keep the oven door open for longer then a couple seconds when doing so or you will lose a lot of the heat and they may not cook properly. If you poke one with a toothpick and it comes out clean then they're done. If not then bake for a few more minutes.

    Let cool for 5 minutes. Remove from the pans and place on a cooling rack.

    Cool Tools:

    Thursday, January 21, 2010

    Bananarama...

    My kids eat a lot of bananas. They only like them when they are almost ripe with a tinge of green still on the ends though. Once they lose that green and start developing the brown spots, it's over. My son will hand back a ripe banana and say that it's too "buttery". I didn't realize there was such a thing as too buttery. The more the merrier I say! I guess when it comes to bananas, buttery isn't good. Strangely, I too like my bananas slightly under-ripe. Who knew that stuff was hereditary? So this gives me a two day window with the yellow fruit. The rejects are turned into sweet and moist banana bread. Here's the recipe that I always use.


    Milk Chocolate Chip Banana Bread

    6 tbsp (3/4 stick) unsalted butter
    2 eggs (large or extra-large), beaten
    1/2 cup plain yogurt
    3 LARGE, very ripe bananas; mashed
    2 tsp vanilla
    2 cups of flour
    3/4 cup sugar
    3/4 tsp baking soda
    1/2 tsp salt
    1 cup milk chocolate chips (Ghirardelli's are delicious) or toasted chopped walnuts or both!

    Adjust the oven rack to the lower-middle position. Preheat oven to 350 degrees F. Grease your loaf pan and dust it with flour. Tap out the excess flour.

    Melt the butter in a large glass mixing bowl. Microwave works great. Set aside to cool. In the meantime, whisk the flour, sugar, baking soda and salt together in a separate mixing bowl. Set aside

    Add the mashed bananas, yogurt, eggs and vanilla to the melted butter bowl. Mix well. Next add the dry ingredients and chocolate chips to the bowl and fold until just combined. Don't over mix. Pour the mixture into the loaf pan. Bake for 55 minutes. If a toothpick comes out clean then it's done. If not then bake for a few more minutes.

    Let cool for 5 minutes. Remove from the pan and place on a cooling rack.

    *Try putting a couple slices in the microwave and then add a scoop of vanilla ice cream on top! It tastes like bread pudding.


    Cool Tools:
    Calphalon Classic Bakeware 5-by-10-Inch Rectangular Nonstick Large Loaf Pan
    Calphalon Classic Bakeware 5-by-10-Inch Rectangular Nonstick Large Loaf Pan

    Sunday, December 13, 2009

    Apple of my eye...

    When my son was old enough to eat apples on his own I purchased this funny contraption that peeled, sliced and cored them all at the same time. Not only was it quick and easy but it did a much better job than I could do with paring knife. The bonus, my son found it extremely amusing and he was asking for apple slices all the time. Now I'm not a great baker but I'm quickly learning that my friend Zarah is amazing at it. She went apple picking this Fall and made this tarte Tatin that was to die for. Thinly sliced apples on a delicate pastry. Heavenly with a scoop of vanilla ice cream! What immediately came to mind when I saw her dessert was the apple contraption. It would make baking with apples a breeze. I may have to start practicing! Thanks for the inspiration, Z.

    Pinzon Apple and Potato Peeler, Corer, and Slicer  $19.99

    Thursday, December 3, 2009

    I Scream...

    A few years ago, I purchased a Cuisinart 1-1/2-Quart automatic ice cream maker. I think I was pregnant and craving all sorts of naughty, fattening foods. Hello chili cheese fries. I justified it by considering ice cream part of my calcium intake. Good for building babies! Well, a few years and many creamy concoctions later I have to say I am really glad I invested in it (actually at less than $50 it is hardly an investment). I keep the chilling chamber in the freezer at all times so that I can make ice cream on a whim. It takes less than half an hour to whip up a batch and the flavor options are endless. Of course we all go through those times where our jeans seem a little tighter than usual. That's when you make the switch to making sorbet instead. Lemon sorbet on a hot day is perfection! Now that I have kids it makes even more sense to have one. Bottom line...kids love ice cream. Making it from scratch together is a great activity. They love using the electric hand mixer to dissolve the sugar into the milk. Then are mesmerized by the spinning magic machine that turns milk into frozen goodness. You know exactly what ingredients are going into it. Oh and it's damn good! There have been several occasions where I've even brought a container of it to a dinner party. The other guests will go crazy over it especially when they find out that you made it at home. I usually just make the simple vanilla ice cream. Milk, cream, sugar and vanilla are the only ingredients you need so as long as you use the best quality ingredients, it will turn out great.

    So today I found some pears in the fridge that needed to be eaten ASAP. They weren't spoiled by any means but had definitely been around long enough. I had a bottle of muscat that my mother in law had brought over last week that we forgot to drink. The answer was obvious...poached pears. I quickly made a container of vanilla ice cream and put it into the freezer. Then I brought two cups of the muscat (any sweet wine will do) to a simmer with half a cup of sugar, some ribbons of lemon zest, a few dashes of cinnamon and about a teaspoon of grated ginger. I added the four pears that I had quartered and cored. Depending on the firmness of the pears I would say poach them in the liquid on a very low simmer ten minutes for a harder pear and of course less time for a softer pear. I wouldn't even bother doing this with extremely ripe ones. Mush city! Remove the fruit after you are done poaching and put them aside. Reduce the rest of the liquid for a few more minutes until it is thick and syrupy. Strain out the pieces of lemon and ginger and set aside to cool. Now when it is time for dessert, you just arrange the pears nicely on a dessert plate or shallow bowl, scoop on some ice cream and drizzle with a little of the wine reduction. See, I totally eat fruit.